Terminal-like startpage guide
We're going to create a really nice and simple terminal-like startpage. Keep in mind in order to keep this sleek we will not be including any functionality beyond visual aesthetics.
That being said, if you are coming here with very little knowledge of CSS/HTML I think it's a good idea to read through the entirety of MDN's Getting started with the web. If you are new to web development, this will significantly increase your understanding of everything going on.
If you do not want to increase your knowledge that much, the bare bones on HTML and CSS will do well...
mkdir startpage#
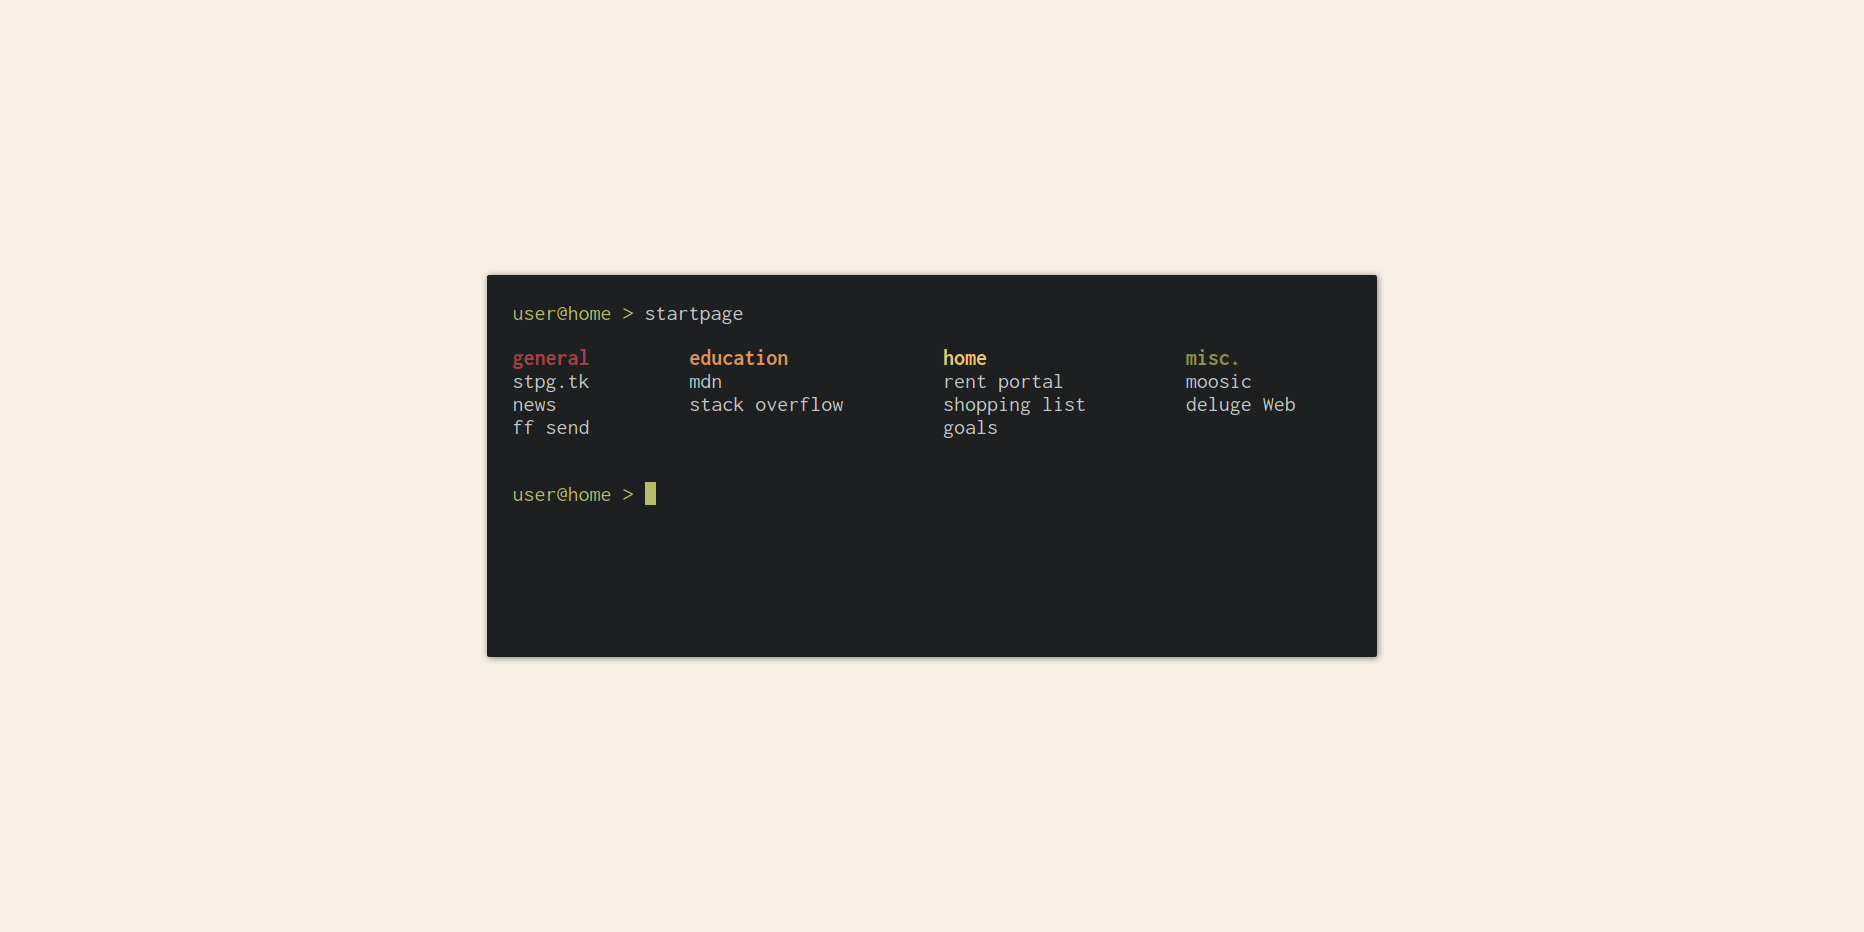 - The startpage we are making
Create a single file on your computer and name it index.html. The name of the
file actually doesn't matter too much, what really matters is the ending
.html, always include that.
Open this file in a text editor of your choice (We recommend using VS Code). You should be faced with... an empty file.
Now time to start our development! Type out (better) or copy (worse) the HTML below:
<!DOCTYPE html>
<html>
<head>
<title>user@home > newtab</title>
</head>
<body>
<p><span>user@home > </span>newtab</p>
</body>
</html>
We need to use > as a replacement for the > symbol because it might
confuse certain browsers!
If you look at the text above and don't understand it, please read the first paragraph again.
Now drag this file over to your browser, you should be able to see a page with just the test "user@home > newtab" displayed in the top left corner.
Not much of a startpage, we need a few links to our favourite websites.
...
<body>
<p><span>user@home > </span>newtab</p>
  <a href="">stpg.tk</a>
  <a href="">news</a>
  <a href="">ff send</a>
</body>
...
Note I use ellipsis ... to remove text that is not relevant to what we are
changing. The full HTML is at the bottom of the page.
With all that said and done, you should have something that looks like this:
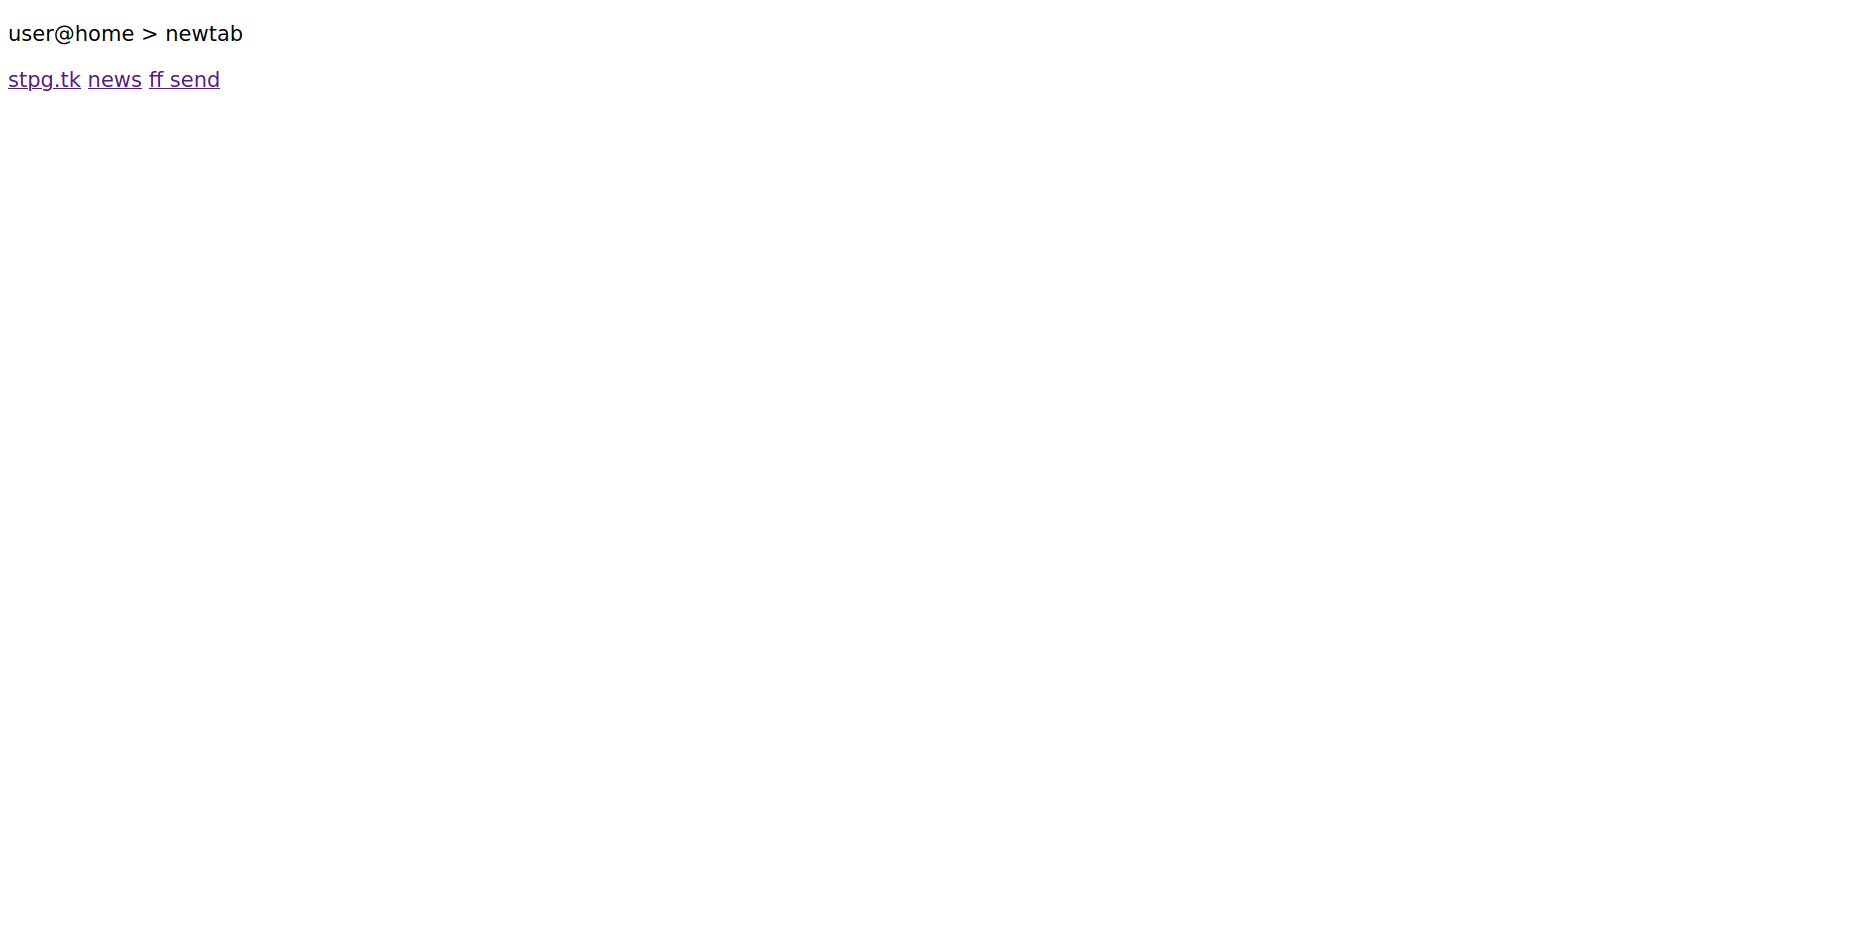 - Plain-text is great!
Terminals 101#
We're going to make this look a lot more like a terminal right now. Let's get to some styling.
With your file opened, we are going to be adding these CSS rules:
...
<head>
  <title>user@home > newtab</title>
  <style>
    html {
      align-items: center;
      display: flex;
      height: 100%;
      justify-content: center;
    }
  </style>
</head>
...
Refresh the page where you opened your file or simply drag it over again if you closed it, you should now see all of your text is centered in the middle of the page. Well done for making it this far.
We're going to make a change to our HTML structure, this will help us style individual elements quicker.
...
<body>
<p><span>user@home > </span>startpage</p>
<nav>
<ul>
<li>general</li>
<li><a href="">stpg.tk</a></li>
<li><a href="">news</a></li>
<li><a href="">ff send</a></li>
</ul>
</nav>
<p><span>user@home > </span>_</p>
</body>
...
Notice we added the extra indicator at the bottom, makes it look like more of a terminal!
Now let's make it a bit more coherent by adding some general padding and colors,
add these rules in the <head> block of our document:
...
  <style>
    html {
      align-items: center;
      background-color: #f7eee4;
      color: #c5c8c6;
      display: flex;
      height: 100%;
      justify-content: center;
    }
    body {
      background-color: #1d1f21;
      border-radius: 2px;
      color: #c5c8c6;
      display: flex;
      flex-direction: column;
      min-height: 30ch;
      min-width: 50vw;
      padding: 2em;
    }

    p {
      margin: 0;
    }

    p span {
      color: #b5bd68;
    }

    a {
      color: inherit;
      text-decoration: none;
    }
  </style>
</head>
...
Honestly, this looks pretty dang good already. Let's make the link groups look a little nicer.
...
    a {
      color: inherit;
      text-decoration: none;
    }
    a:focus,
    a:hover {
      font-weight: bold;
    }

    ul {
      list-style-type: none;
      margin: 0;
      padding: 0;
    }

    nav {
      column-gap: 2em;
      display: grid;
      grid-template-columns: auto auto auto auto;
      padding: 1em 0;
    }
  </style>
</head>
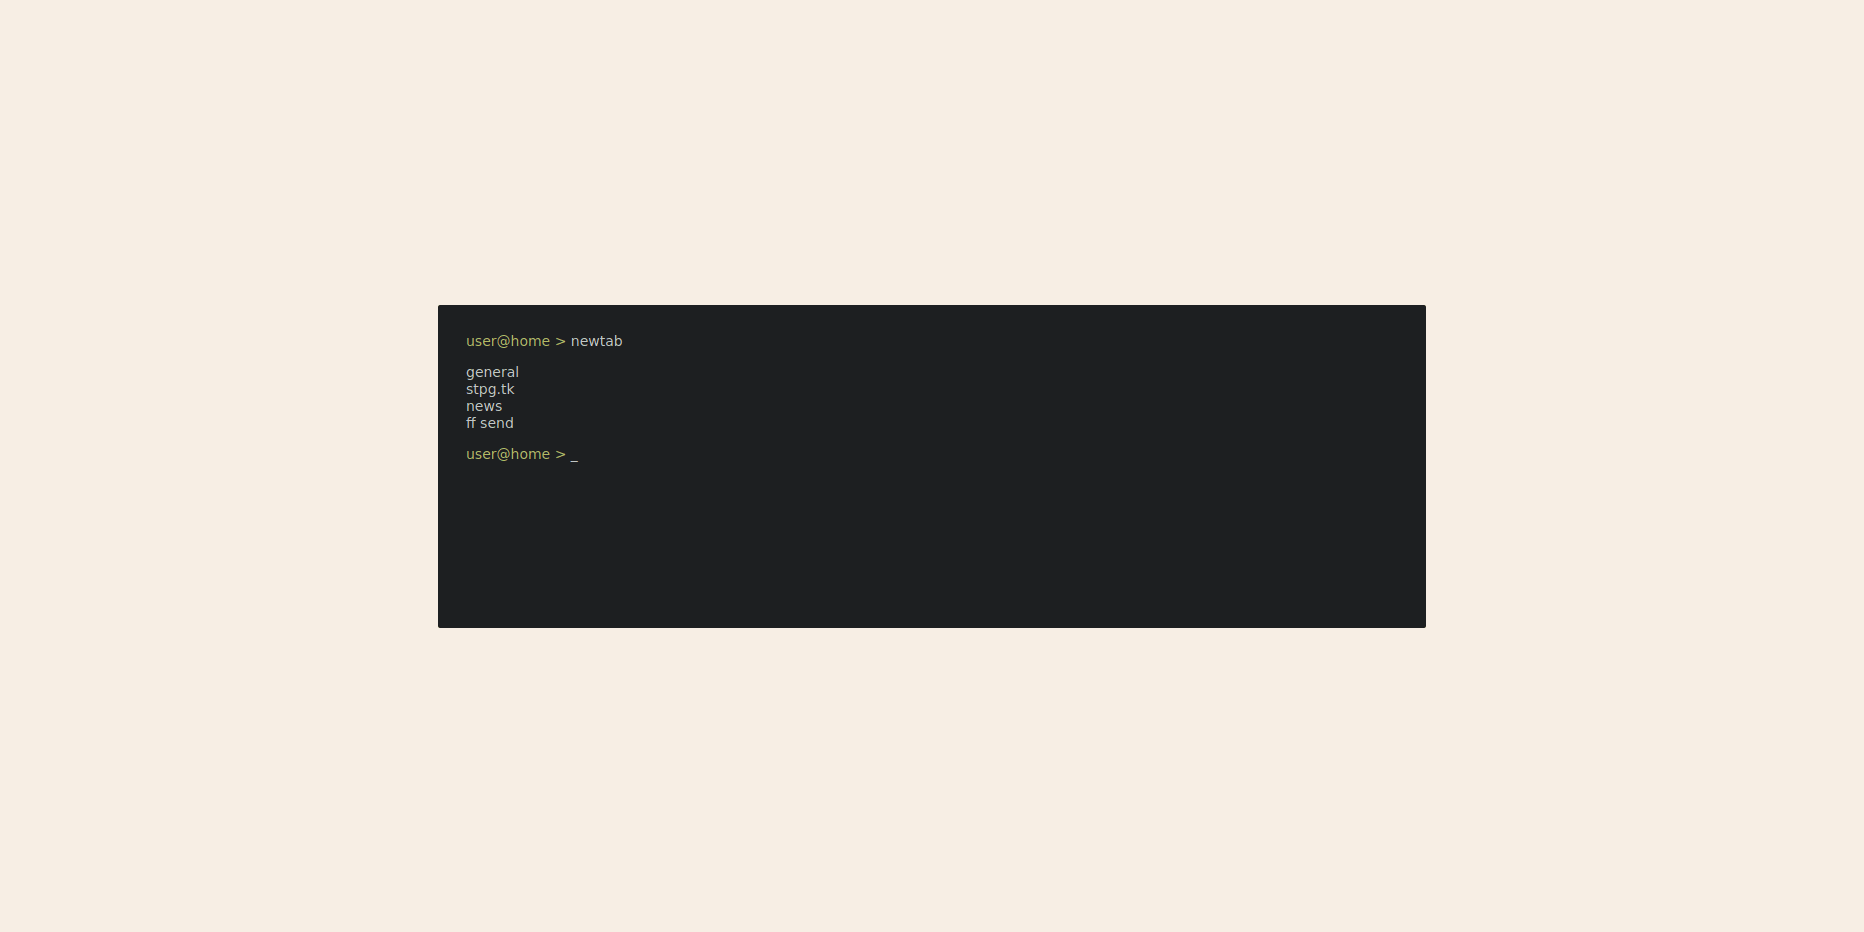 - Looking very cosy!
Right, we added quite a bit so you might like to take a quick look over
everything and make sure you understand it all. If any rules look weird, it's
simple to search <rule name> MDN, i.e column-gap MDN.
If display: flex and display: grid confuses you, worry not! It confuses a
lot of people.
Have a look at MDN's Guide to grid layout , as well as Learn flexbox.
A single grain of rice#
We have quite the startpage here, let's add a few last touches to make a house a home.
...
  <style>
    html {
      align-items: center;
      background-color: #f7eee4;
      color: #c5c8c6;
      display: flex;
font: 22px/1 "Inconsolata", monospace;
height: 100%; justify-content: center; } ...
The font Inconsolata should be on your system, if your page does not look
similar to the screenshots you might have to install it. You can always look
for another font, too! Check out MDN's
guide on font families
Let's add a subtle shadow to the terminal:
...
  <style>
    body {
      background-color: #1d1f21;
      border-radius: 2px;
box-shadow: 1px 1px 6px #1d1f2187;
      color: #c5c8c6;
      display: flex;
      flex-direction: column;
      min-height: 30ch;
      min-width: 50vw;
      padding: 1em;
    }
...
We are going to give some color to the link categories!
...
  <style>
    nav {
      column-gap: 2em;
      display: grid;
      grid-template-columns: auto auto auto auto;
      padding: 1em 0;
    }
    ul:nth-child(5n + 1) li:first-child {
      color: #a54242;
    }

    ul:nth-child(5n + 2) li:first-child {
      color: #de935f;
    }

    ul:nth-child(5n + 3) li:first-child {
      color: #f0c674;
    }

    ul:nth-child(5n + 4) li:first-child {
      color: #8c9440;
    }

    ul:nth-child(5n + 5) li:first-child {
      color: #85678f;
    }

    li:first-child {
      font-weight: bold;
    }

    li:last-child {
      margin: 0 0 1em;
    }
  </style>
</head>
...
And to bring everything together, let's make a small cursor blink at the bottom! First add an ID to the cursor to make it easily identifiable (ba-dum-tss):
...
    </ul>
  </nav>
<p><span>user@home > </span> <span id="cursor">_</span></p>
</body>
...
And now the blink animation:
...
    li:last-child {
      margin: 0 0 1em;
    }
    p #cursor {
      background-color: #b5bd68;
      animation: blink 2s infinite;
    }

    @keyframes blink {
      0% { opacity: 0; }
      49% { opacity: 0; }
      50% { opacity: 1; }
    }
  </style>
</header>
 - All finished!
If you've come this far, read through everything, and created your very own startpage: well done!. It can be very confusing, especially for people who have little to no experience in web development.
Going from here, there are plenty of things you can do to this startpage. Add more links, change the colors a bit, maybe add a search bar?
If you are looking for the full HTML file, it's here. You can also check the full git repository.
Be sure to share your creation with us!